
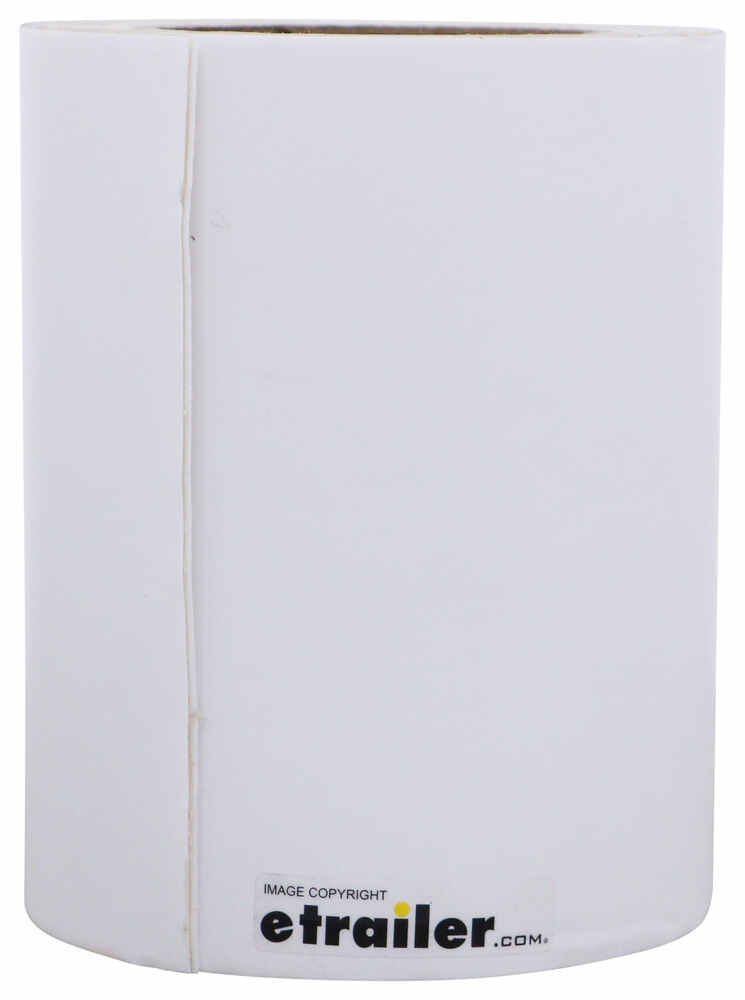
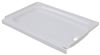
Quick Roof Repair Tape for RV Roofs - 25' Long x 6" Wide - White
(54 reviews)
Price: $56.65
In Stock
Quick Roof Repair Tape for RV Roofs - 25' Long x 6" Wide - White
Item # QR44FR
Retail:$65.66
Our Price: $56.65
You Save: 14%
In Stock


Need help with installation?
Locate installers near me- All Info
- Reviews (54)
- Q & A (0)
- Videos (2)
- Photos
Quick Roof RV Roof Repair - QR44FR
- Tape
- White
- 25 Feet Long
- Quick Roof
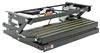
If you noticed a leak in your RV, you should act fast to prevent major damage. Quick Roof repair tape seals joints, seams, and tears. Steel-Loc adhesive can be applied to damp surfaces, so you don't have to wait for rain to stop to stop a leak.
Features:
- Quick Roof repair tape instantly stops leaks and permanently repairs RV roof
- Perfect for sealing joints, seams, tears and punctures
- Great for vents, windows, skylights, awnings, tents, and more
- Steel-Loc adhesive works with EPDM, TPO, Hypalon, metal, modified asphalt, vinyl, fiberglass, PVC, OSB, rigid extruded polystyrene, wood, and tile
- Can be applied to most surfaces when damp
- Won't crack, harden, or shrink
- Easy installation - cut length needed, peel off backing, and stick to clean surface
- Steel or rubber roller recommended for smooth application on flat surfaces
- White color
- Made in the USA
Specs:
- Dimensions: 25' long x 6" wide
- Application temperature: 25 degrees F or warmer
- 15-Year limited warranty
UBE625 QuickRoof by Cofair RV Roof Leak Repair Sealant Tape - 6" x 25' - White


Video of Quick Roof Repair Tape for RV Roofs - 25' Long x 6" Wide - White


Videos are provided as a guide only. Refer to manufacturer installation instructions and specs for complete information.


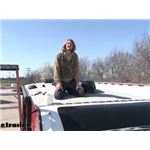
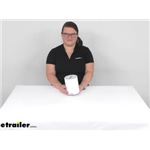
Video Transcript for Quick Roof RV Roofs Repair Tape Review
Hi there RV and trailer owners. Today, we're gonna be taking a look at and showing you how to seal up your leaky roof here, using quick roofs extreme roof repair kit. This comes in a couple of different colors. We're gonna be using the white today, but you can also get it in a tan color. It's a six inch wide strip and you get 25 feet in length here. So you got plenty to work with.
We're gonna be resealing the cap here at the front, where it goes across all the way across. It has already been repaired once at another facility and the leaks we're still occurring. So we're gonna be using this, because this will bond to almost any surface, whether it's vinyl, plastic, metal, or even wood. There's a whole lot of other materials out there that it also bonds to. So this is gonna be perfect for this application, because we've got the more vinyl type top here and our plastic cap.
And they're two different types of surfaces. So it's important that you got a material that can bond appropriate to both of those. To assist us with this though, to ensure that over the years of having this on here, especially, since this is right here at the front, where the wind is just kinda going over the top of it here. It's gonna be beaten on this, trying to peel it off. Not extremely strong bonding, probably won't peel off, but we don't wanna take things by chance, 'cause water damage is no joke.
It can start to spread, be very costly and it can make you sick if it's unattended. So we've got a couple of different brands of self-leveling sealant here at etrailer. You've got extreme and we've got alpha. We're gonna be using alphas today, but they're both phenomenal sealants. So after you unwrap your kit there, just got some like paper around it.
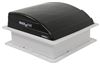
There are a lot of pieces of tape over it. So you get all those pieces off. So you can start to unroll it here. We're gonna just unroll it and work our way down. The outside edge here is gonna be the edge we want facing up. And the other edge here has a coating, like a non-stick backing on it. We'll be peeling that backing off and putting the adhesive side down on top of our roof. Now we already did a little bit of prep work here, and ripped off the old strip that was up here, that was previously on there. Just get that out of the way. You wanna try to get some of the old sealant off. You don't have to get all of it off, 'cause this is gonna cover it up. We're just mainly trying to get all like any bulk chunks that's up, that's off here on both the edges. The stuff here in the middle, our vinyl's gonna be, our material here is gonna be completely covering it. So it's not really that important there but on the edges where we're trying to seal, we want that to be relatively smooth. So we're just gonna start rolling it out here and we'll be rolling it down. I'm just gonna get the a certain amount and kind of just get it started. All right. And our. Edge here, we're just gonna try and keep it straight. We're not gonna go quite as far forward as the previous one was, all the way to the edge there. 'Cause that when we put the self leveler on there, it's gonna wanna kind of go over the edge and we wanna try to not get our white self leveling sealant on the black surface. We're gonna try to keep all the white sealant on the white area, so that way it stays looking nice too. So we're just gonna get this in place here, keeping it back just a little bit, so we can use our self leveler to cover all that. Get it laid down there, and then we're just gonna smooth it out, working it down down. And we're gonna do this just continually all the way down, till we make our way across to the other side. And as we're doing this, you see it's starting to crease right there, we don't wanna have any creases on any of our edges. So it seals. So I got a small just like scraper tool. If you got an old credit card, those will work well also. We just wanna try to make sure we don't have any of those creases, like that, get under it. Get that crease out and then lay it back down. And then when we get here to the other side, we're just gonna cut along the edge here. And I'm just kinda using the roll here to help me get an nice straight edge. Just kind of rolled it up tight where I want it to cut and we're just gonna slid it right down along there. I also like doing it like this, 'cause this way I'm not cutting down towards the roof. I'm cutting sideways, so that way I know I'm not gonna cut into any of the roof material. And we can just smooth that out. And we're just gonna do another pass, working our way across, just back and forth, making sure we get the edges very smooth. And now to ensure that wind forces that's going across us doesn't ever peel it up and to just make it an even better bond here to the roof, we're gonna put that self leveling on top. We're gonna go all the way around the edges of our piece that we put on here, all the way around. And you wanna be pretty generous with this. It will start to. Gravity will take effect and it'll start flattening out as it's up here to cover up our edges. All right, we finished putting our sealant all the way around the edges, and we even did a little bit where the previous repair, there was some small pieces, we went ahead and resealed those as well. Now you wanna give this about 24 to 48 hours to fully level itself and seal up, 'cause it is still gonna be just a little bit tacky here when we touch it, and we'd like it to be a little bit more adhered to the surface, to where it can't smear or pull off. And while we use it up at the front to repair a leak that we had, you can use it too for installation. For an example like these roof vent covers, this is just self-leveling sealant that was applied on here. But if you wanted an extra layer of protection, you could use the strips all the way around, just like we did up there in the front. And I still recommend putting the self-leveling sealant around the edges and that'll just give you a better seal. And then with the nice look of the vinyl and the white, it just kind of helps it be smoother and just integrate into your roof a little better and look nicer. And in addition to roof accessories, and the cap that we sealed there on our bigger motor home, something like this is also a great application. I had a little accident. This is my personal camper. And I scraped the side of my house when I was parking at one time. So we can use these strips to go down here and seal this back up as well. And that'll just help keep my awning here from collecting moisture and molding. If you have tents as well, and you get a little rip in your tent, you can use it to repair tents also. When you go to apply your repair strips on, we wanna make sure that it's at least 25 degrees fahrenheit out. If it's colder than that, it won't adhere as well. But as long as you're above that, you'll be okay. And you don't have to wait until it's a nice dry day to do this. If you get up in the morning and you got a little bit of morning dew on here, this will stick to damp surfaces. And you could just give it a quick wipe down, and if there just happens to be a little moisture left, it'll still adhere just fine to the top here. And what makes this a better repair than simply just using like a self-leveling sealant is that it will maintain its properties over time. So it's not going to shrink. If you put this in place it's not gonna shrink down. And if it we're to shrink, things that would happen would be, if you had any sealants and stuff on here, or if it was covering up a specific edge, it could shrink to a point where it's not covering that edge. Or if you had sealant on it, it would cause the sealant to crack. But you don't have to worry about that with this. It's gonna maintain its shape. So it's not gonna cause any seals to leak in the future. It's not gonna harden. It's gonna stay conformed to the roof contours. And it's nice that it doesn't harden. 'Cause if it does harden, it could potentially start to crack. And since we stay nice and smooth like this, it's not gonna crack in the future, which would let in moisture and things like that. So this keeps it out. It's just gonna be a better sealing repair than self-leveling sealant by itself. 'Cause the self leveling sealant, it's great stuff. I use it on my popup. I had a hole on there that I've used to seal it up and it's been like that for several years, but when I touch it, I can feel that it's fairly hard. And I know that at some point it's gonna start to crack and I'm probably gonna have to repair it again. So next time that I repair it, I'm probably gonna be putting some of this down and then putting that self leveling sealant on top of it. And that should be a permanent repair for the life of that camper. So regardless of whether you are fixing a leak on the roof or if you're adding any type of accessories, this will give you the opportunity to seal it up better than just any kind of sealant would by itself and give you a more pleasing look in the end..
Customer Satisfaction Score:
99% were satisfied with this product
1% of customers were not satisfied
- Product did not meet expectations
Customer Reviews
Quick Roof Repair Tape for RV Roofs - 25' Long x 6" Wide - White - QR44FR
Average Customer Rating: 4.8 out of 5 stars (54 Customer Reviews)
If you noticed a leak in your RV, you should act fast to prevent major damage. Quick Roof repair tape seals joints, seams, and tears. Steel-Loc adhesive can be applied to damp surfaces, so you don't have to wait for rain to stop to stop a leak.by: Steve C09/29/2022
Perfect for my restoration.
by: Chase 06/27/2023
by: Thomas 05/06/2021
by: Karen 02/16/2021
by: Ardene01/15/2023
by: Edmund 02/18/2023
by: Dustin 09/19/2023
They should rename it to the BEST TAPE EVER!!!! I had used this to patch a few areas where the rubber had torn right before I sealed the roof. It is holding up like champ!!! If this was made in a 4x8 roll you could literally put a complet new roof on yourself.i highly recommend this tape it holds up better than some of the other rename brands I had used in the past on other roofs.thanks E-trailer
by: Mike 08/03/2023
I had a small tear in my trailers roof, it’s been almost a year and is holding up great
by: Philip 09/26/2023
Exactly what I needed to fix a couple small rips in my roof, thanks trees!
by: Kyle 09/12/2023
Worked well
by: Bronson01/06/2022
This stuff is Magical! My living quarters horse trailer had a leak. Thought it was on the slide out, but after replacing the rubber gasket, it was still leaking. Further inspection revealed the original factory seal tape, on the riveted roof seam, was deteriorating and cracking. Wiped down the old tape and placed this new tape right over top of it. No more leak. 75' roll was enough to do my entire trailer (28' x 7' gooseneck). WARNING: when you begin to put this in place, be sure you have it where you want it. It is VERY sticky and unforgiving once it makes contact with a surface.
by: Kyle in Texas03/25/2022
This tape is amazing. It sticks to anything, is completely waterproof. I have used it to patch a tear on my RV roof, patch some areas in the vinyl awning where the sun hits it even when it is retracted and in storage, and even patch the vinyl bed cover in my pick up truck. See the photo below.
It comes in white or black. I wanted black so that it would match the truck bed cover. I've used white before also and it's equally as good
by: Leonard 08/03/2023
Looks good. Works great.
by: Stephen 04/08/2023
Great service and products.
by: Daniel05/12/2022
standard shipping very slow, so if you have an actual leak, consider paying to expidite.
product is very sticky , clean roof hole area, put patch on , rolled thoroughly to ensure adhesion. rain expected tonight, i dont think its getting in this hole ever!
by: Loran01/27/2023
The Shipping was punctual.the order was correct.
by: Kenton03/25/2022
Added to my tool box for emergencies, hope I NEVER need it.
by: Peter 08/18/2021
Fast delivery. Excellent customer service. Tape seems high quality - haven’t used it. Keeping it in RV for emergency’s.
by: Harry05/30/2022
Very easy to use and worked great for repairing roof quickly
by: Gary08/23/2022
Great service and good products
by: Brooke 08/04/2022
Should have purchased 8 foot roll!
by: 03/17/2022
works great
by: Ron 07/08/2021
Just used it today and looks like it is going to work great.
by: Clyde 08/13/2023
by: Michael11/16/2023
25
53
Show More Reviews
See what our Experts say about this Quick Roof RV Roof Repair
- Roof Repair Tape Which Can Be Used To Seal Leaks Even When WetYou will need the Quick Roof Repair Tape # QR34FR. This particular roll is 25' long and 4" wide. It is one of the few products that will stick even to a wet surface. We also have it in a 6" wide Roll # QR44FR if you are wanting the wider size.
view full answer... - Recommended RV Roof Repair Tape For RV AwningsThe RV Roof Repair Tape, # QR44FR can be used on fabric such as RV awnings and won't crack, harden, or shrink. Simply cut to the desired length needed the awning fabric then remove the backing and stick it over the desired area you want to cover.
view full answer... - Recommended Repair Tape For RV Awnings The RV Roof Repair Tape Item # QR44FR is listed as being rated to seal any damage on your RV's awnings. This product can be cut to the desired length needed for the damage to the awning fabric and then just simple remove the backing and stick on the tape for immediate leak protection.
view full answer... - Can The Quick Roof Repair Tape for RV Roofs Be Used On An RV Awning?Yes, the Quick Roof Repair Tape for RV Roofs # QR44FR is suitable for use on the top exposed portion on your RV awning. This material is flexible enough to be wrapped around the curved portion on your awning.
view full answer...
Do you have a question about this RV Roof Repair?
Info for this part was:

Video Edited:
Jacob T

Video Edited:
Chris R

Installed by:
Kathleen M

Edited by:
Amanda M

Video by:
David F

Written by:
Halie H

Updated by:
Cody B
At etrailer.com we provide the best information available about the products we sell. We take the quality of our information seriously so that you can get the right part the first time. Let us know if anything is missing or if you have any questions.
Product Experts Available Now!
Call 1-800-940-8924
Thank you! Your comment has been submitted successfully. You should be able to view your question/comment here within a few days.
Error submitting comment. Please try again momentarily.